Reset WordPress Admin Password in Database via phpMyAdmin
There are a variety of reasons that you may need to reset the password of an admin account in WordPress directly in the database, primarily when the password has been forgotten and the ‘password recovery via email’ functionality on the WordPress login page is not working for you.
Resetting the password in the database via phpMyAdmin on your live or local server (pre production environments such as MAMP or WAMP) is relatively straight forward.
Access phpMyAdmin on your Server
The first step to take is to open your servers phpMyAdmin. On a local server in a pre production environment such as MAMP, XAMPP or WAMP this should be accessible via your launch page that is displayed in the browser when starting up the server, or via the control panel for the respective application that you use.
If you are working on a live site, then login to your respective hosting account for the site that you are resetting the password on. Within the control panel for the sites hosting their should be an icon for phpMyAdmin, on platforms such as cPanel its usually under a heading labeled ‘MySQL’ or ‘Databases’. Simply click the icon and it will launch phpMyAdmin (some platforms may require you to login to the account again).
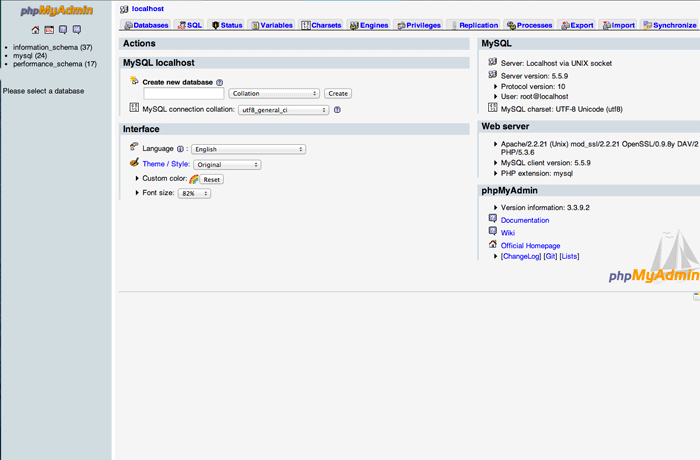
Once logged in you should be displayed with the phpMyAdmin interface as displayed below (depending on which version is installed the UI of the interface may vary slightly, but the structure of the navigation etc. will be consistent).
Editing the Password field in your WordPress MySQL Database
Now that you are logged in to the corresponding MySQL database for your WordPress site that you need to edit the password for, simply follow the steps below.
Firstly we need to locate the relevant database that we need to update as you may have multiple databases. If you don’t know the name of the database that is used for the WordPress site that you require the password reset, you can FTP the sites root, public directory and open the config.php file in your favoured text editor. This file will detail the name of database contained in the php statement below.
/** The name of the database for WordPress */

define('DB_NAME', 'this_will_be_your_database_name');
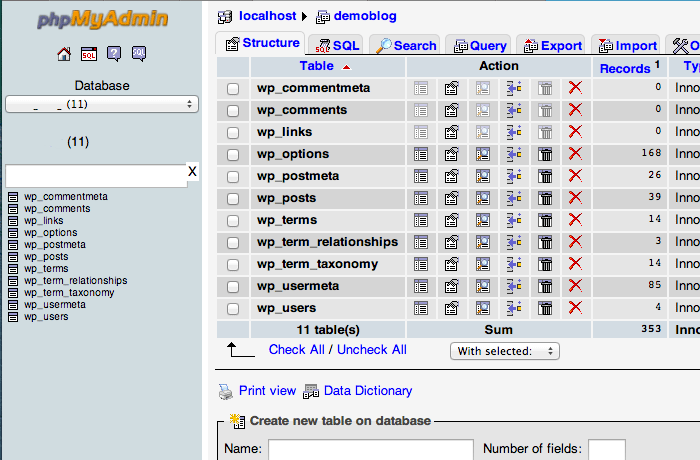
Once you know your WordPress installs, database name, click on the database tab in your phpMyAdmin interface to display a list of all databases available.

Now click on your database name to display a list of all the tables contained within it.
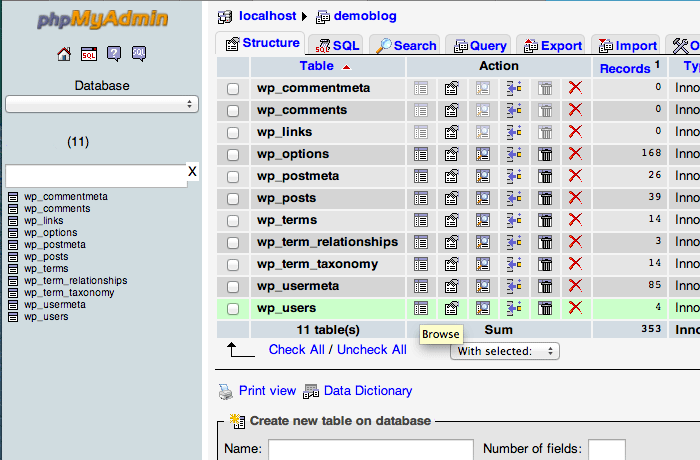
Locate the ‘wp_users’ table and click on the icon to browse the tables contained within it.
You should now be displayed with a table of all the users for the WordPress site. Look at the list of users for the admin account that you want to reset the password for under the column labelled ‘user_login’.
Now simply click the pencil icon on the row containing the username that you wish to edit the password for.

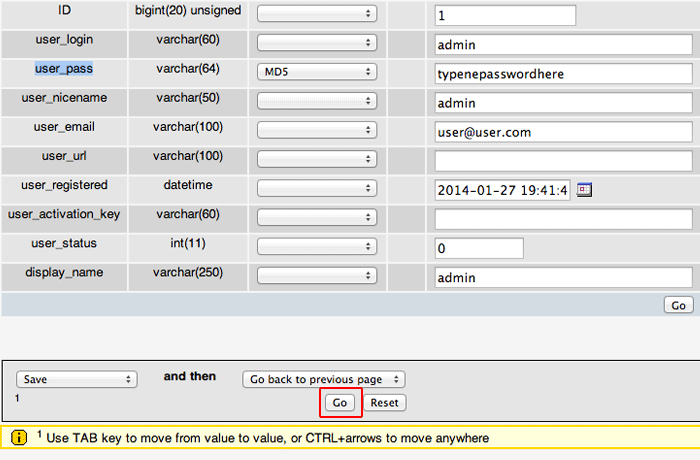
A list of this tables entries are now displayed for that particular account that we are editing. Locate the row labelled ‘user_pass’ which contains the password fields that we are going to edit.
Under the ‘function’ column on the ‘user_pass’ row, click on the drop down menu and select ‘MD5’ on the list (this is very important as its the hashing that encodes the password).
Now in the field under the ‘value’ column on the ‘user_pass’ row, delete the current, hashed password and enter your new desired password as shown below.
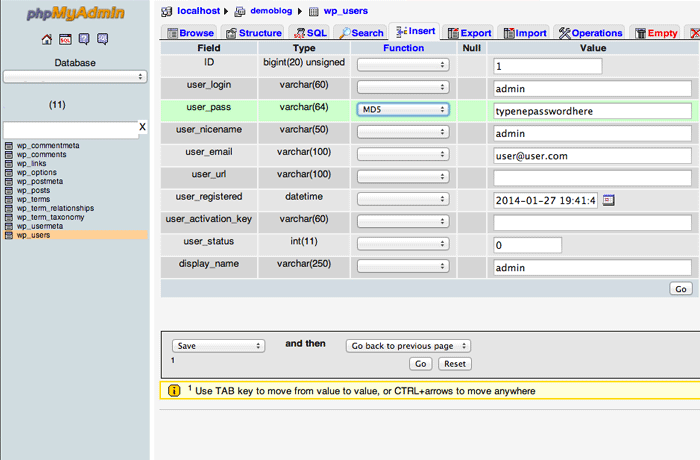
Ensuring the above has been done, click the ‘go’ button to update the information as shown in this image.
You should now go back to the previous screen listing the user account details and be displayed with a successful edit message.
The password for the account has now been updated, so go to your WordPress login page and try the details. If it hasn’t worked, ensure that you have followed each detail in this post, the ‘MD5’ selection is the most common thing that people overlook and fail to do.
All Rights Reserved © Mathew Porter 2024